

Hello, crafty friends! This is Maryám and I am so happy to be back here. For today’s post, I am going to be working with the brand new Mountain Die Set and I will be sharing three projects and ideas on how to use this awesome die set.
First Project – “Explore” Scrapbook Layout

This stand-alone die is great for creating landscape scenes, and so it is for documenting outdoor activities. Last year, I went on a trip to the mountains and I did an 18k trekking. I took a lot of photos of the place and I knew that this die would be perfect for it.

To incorporate the dies into my project, I decided to create two tags. In each tag, I created different landscape designs that reminded me of my trip.

To add some fun to my layout, I used some watercolor flowers that I fussy cut from the Floral Flurries Washi Tape. I also added some icons from the Reflection Collection Chipboard Stickers.

You can check out the video tutorial here to learn how this page came together or watch it in HD on my YouTube channel.
Second Project – “You Are Very Special” Card

You can create so many things and try lots of techniques using dies and one of my favorite ways to use them, besides cutting the images out of cardstock, is as stencils.
For this project, I used the Mountain Die Set as a stencil and created a gradient ink blended background using the four inks from the Tranquility Oval Set that includes the following colors: Misty Morning, Cloudy Sky, Nimbus, and Dark Night.

For the sentiment, I heat embossed the words “You are very special” from the Incredible Stamp Set on black cardstock using Pure White Embossing Powder.
To finish the card, I added some sequins and gold enamel dots.

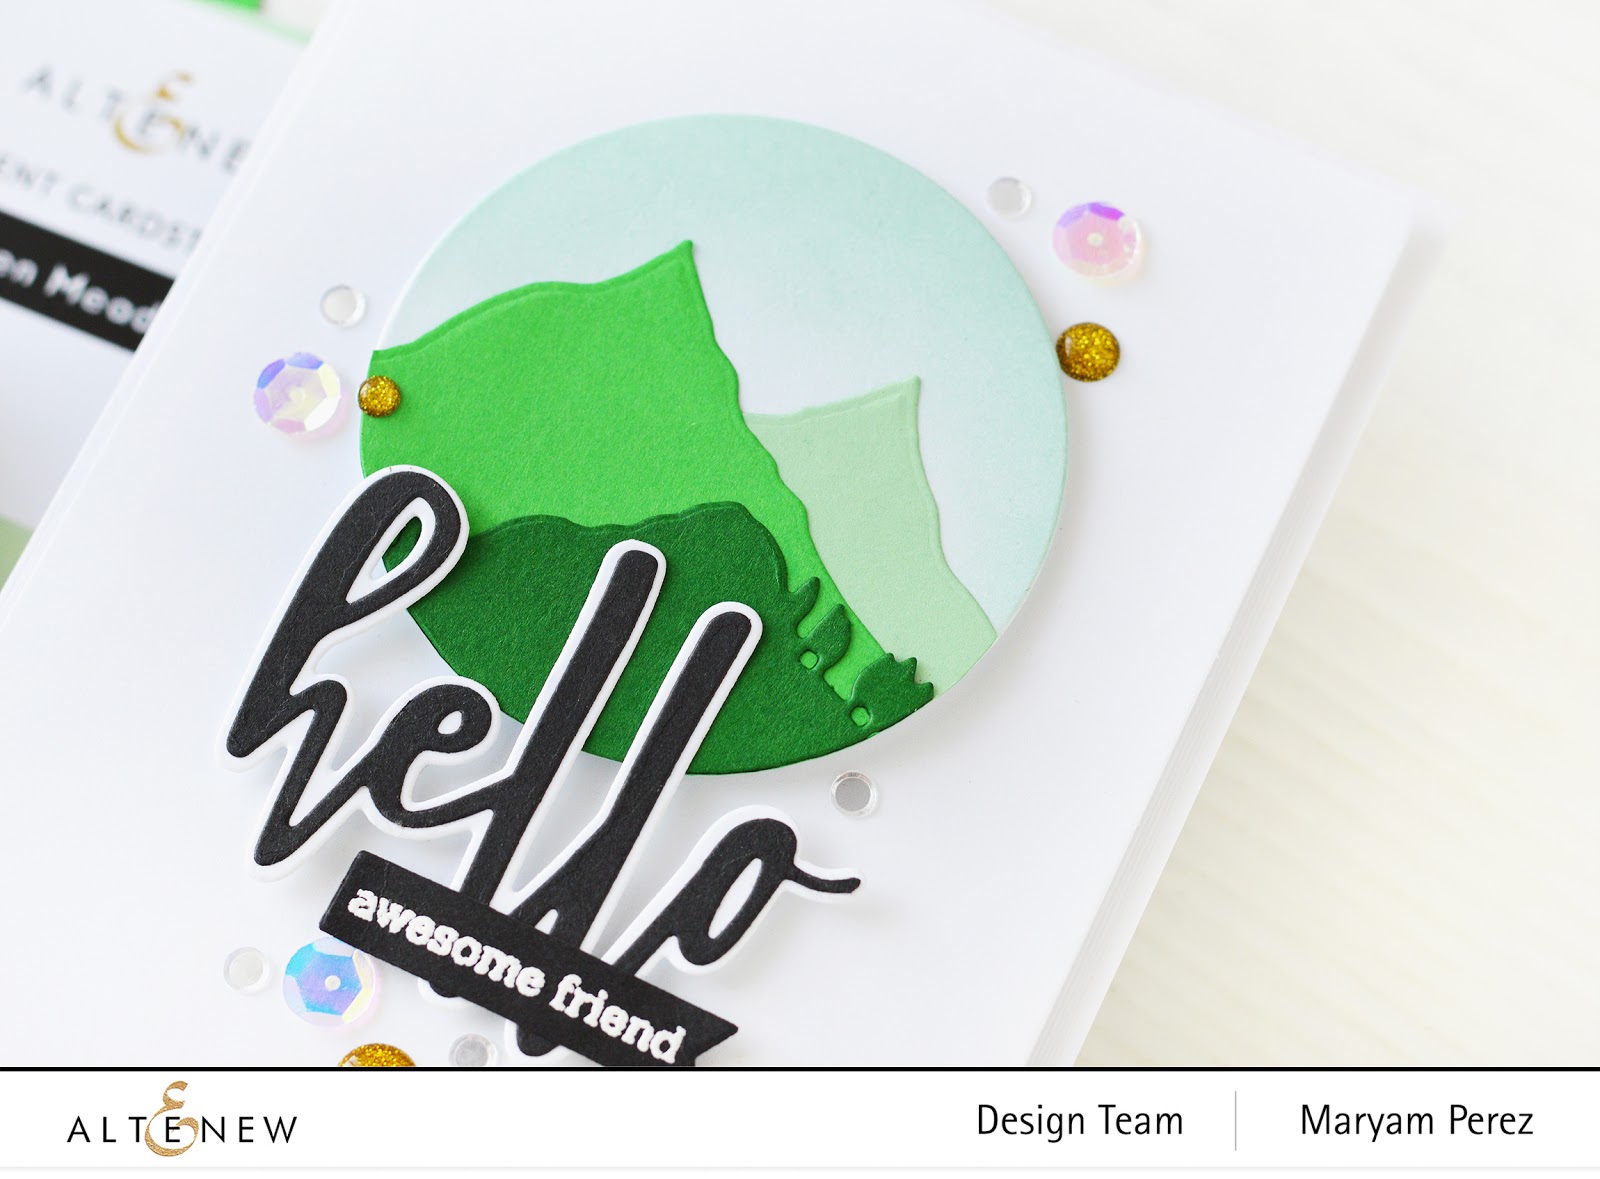
Third Project – “Hello Awesome Friend” Card

For my last project, I also created an A2 card. This time instead of using the dies as a stencil, I cut them out from different shades of green cardstock from the Green Meadows Gradient Cardstock.
Following this, I also cut a circle out of white cardstock and did some ink blending using Mountain Mist Ink. I chose this particular color because it was the perfect light blue tone for the sky.

Once all the elements were cut, I assembled them all together and created a fun forest-themed scene that I adhered to a 5 1/4 x 4″ inches panel using foam dots.
For the sentiment, I used the Hello and Hugs Stamp and Die Set. And, as a final touch, I added some sequins and enamel dots.
That is it for today! I hope these ideas featuring the Mountain Die Set inspire you to create something new! If you have any questions, please leave them in the comments below and I’ll be really happy to answer them.
Have a wonderful day!

You are SO creative! Love those tags and your page! Great video!
ReplyDeleteThank you very much! and I'm so glad you liked my projects :)
Delete