Showing posts with label DIY. Show all posts

ALTENEW MIXED MEDIA INK LOVERS BLOG HOP + GIVEAWAY

Hey, crafty friends! I’m Maryám and I'm so excited to be a part of the Altenew Mixed Media Ink Lovers Blog Hop. If you are coming from the Altenew Card Blog, you are in the right place! :) Your next stop in the hop is Cheiron Brandon. If you get lost, you can always go back to the Altenew Card Blog or check out the entire blog hop list at the end of this post. There is also a fun giveaway, so be sure to read all the way to the end!

DOODLEBUG DESIGN: DIY COLORING CLIPBOARDS FOR KIDS

During these crazy uncertain times, our lives are changing in ways we would never imagine and our reality is now a different one. Since most of us are staying at home right now, I thought it would be fun to share some simple DIY coloring clipboards to make with the kids.

ALTENEW JULY 2019 DECAL RELEASE BLOG HOP + GIVEAWAY

Hello and Welcome! I’m Maryám and I'm so excited to be a part of the July 2019 Decals Altenew Release Blog Hop. If you are coming from Svitlana Shayevich's Blog, you are in the right place! :) Your next stop in the hop is Norine Borys. If you get lost, you can always go back to the Altenew Card Blog or check out the entire blog hop list at the end of this post. There is also a fun giveaway, so be sure to read all the way to the end!

JILLIBEAN SOUP: A MIX THE MEDIA PROJECT FOR YOUR HOME

Hello Everyone! Maryám here with you today to share a new Mix the Media Project. This time I have created a frame using some recycled carton and of course my favorite Jillibean Soup Felt Flowers because I can simply not create a decoration project without them!

JILLIBEAN SOUP: MAKE A MIX THE MEDIA PROJECT WITH ME

Hello, Friends! Maryám here with you and today I am going to be sharing how to make a mix the media project perfect for all of those creative people out there. 

FANCY PANTS DESIGNS: GIFT BOXES


Hello, Friends! Maryám here with you today to share two gift boxes I made with the Magnolia Moments Collection. In order to make these boxes I printed a box template in a regular copy paper and then I traced and cut it in pattern paper. I also made a “window” with an acetate sheet.

DIY: TWO EASY PACKAGING IDEAS FOR CHRISTMAS

Hey Friends! Today I'm going to share two quick packaging ideas for your last minute Christmas gifts using my newest collection, Christmas Joy.

DIY: CHRISTMAS HOME DECOR

Hello, Friends! Maryám here with you today to share a quick Christmas home decor idea. One of my favorite decoration for Christmas (and all year long lol) are reindeer, I just love how they are and look good everywhere.

FANCY PANTS DESIGNS: 2 CUTE GARLANDS

Hello, Friends! Maryám here with you to share a new Project using Fancy Pants Designs Magnolia Moments Collection. For today’s post, I have created two garlands, one has a lot of rosettes and the other one has some banners/little flags.

CLIQUE KITS: HOW TO CREATE A SHAKER CARD

Hello Friends! Maryám here with you today to share a shaker card I made using the November 2017 Kit and some sequins from the December 2017 Kit.

This shaker card was made of some ephemera pieces from the Girl Squad Ephemera Pack that came in the November kit. It only took me about 10 minutes to make so once you have made one you will not want to stop making them!

[DIY] DOILIES DORADAS


¡Hola a todos!
Como les prometí en la entrada anterior, le iba a enseñar como hacía mis doilies doradas de una manera más económica, si bien es cierto, no son iguales a las de Studio Calico o Maggie Holmes, pero si no las tenemos o no podemos comprar, estas nos sirven a la perfección.

[DIY] PACKAGING CON BOLSA DE PAPEL KRAFT

¡Hola Amigas! Las que me siguen por Instagram sabrán más o menos de lo que se trata (aunque si ya pasaron por  Mini Scrappers…). Hace unos días subí una foto del sneak peek de este packaging, ahora se lo voy a enseñar al completo.

Este proyecto lo realicé para el blog de Mini Scrappers, y como saben ustedes, trabajamos en parejas, y esta vez me tocó con Caro.


Como ven lo adorné con unos banderines de papel decorado, uno tiene puntitos blancos, el otro es como chalkboard y el último es de papel vegetal.


Doblé la bolsa he hice dos agujeros, en los cuales pasé un hilo o cordón e hice un moñito. Encima de eso puse un cluster de adornos que había hecho; y luego lo puse en el moñito con la ayuda de una pinza de madera.


Por último puse un sticker de corazón dorado, y salpiqué una gotitas negras encima de los banderines.

Bueno eso es todo, espero que les haya gustado y se animen a hacer su propio packaging.
Nos vemos pronto. Besooss.

[DIY] PIZARRA PARA DEJAR NOTAS

Hola Chicas! Hoy vengo a enseñarles como hacer una pizarra para dejar mensajes, recordatorios o tareas pendientes. Esto es súper útil para no olvidar nada y estar al día con las cosas del colegio o trabajo.

Este post lo hice para el blog de Mini Scrappes, pero también o quise compartir por aquí.

Para hacer esta pizarra vamos a necesitar:
- 1 marco de fotos.
- 1 papel con diseño.
- Silicona Caliente.
- 1 hilo o cordón (no muy grueso).
- Adornos.

Lo primero que hice fue cortar un pedazo de papel con diseño del tamaño que necesitaba.


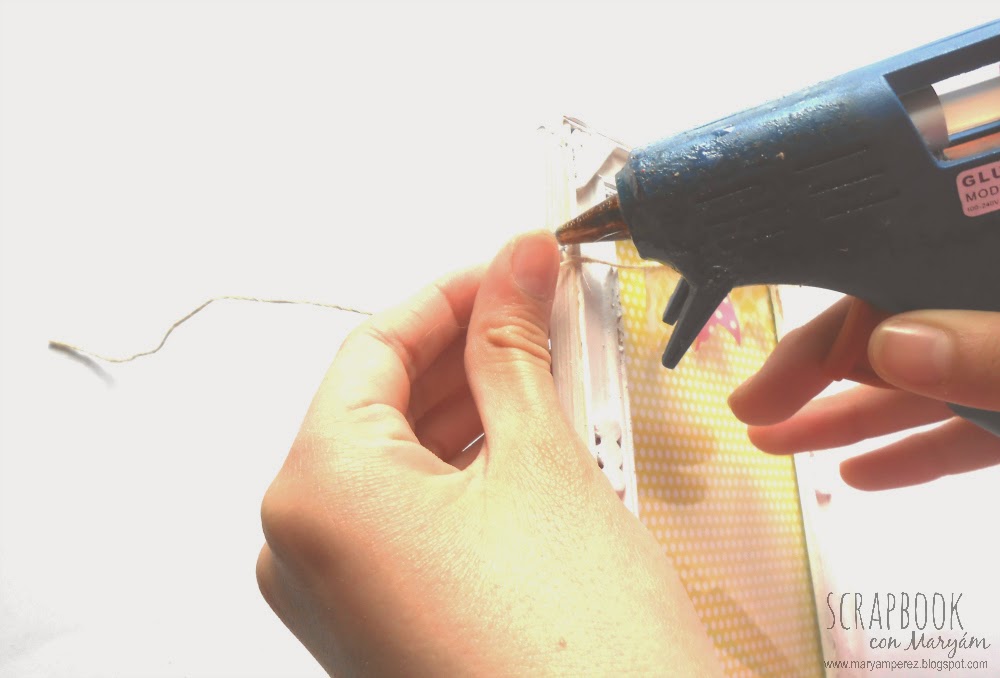
 Después tomé un trozo de hilo e hice unos banderines con washi tape, luego lo pegué al marco con silicona caliente.


Luego seguí adornando, pegué una mariposa en cada esquina del marco.


Una vez que tengas listo lo anterior, puedes tomar un plumón para pizarra blanca y escribir sobre el cuadro.


Y listo!, ya puedes dejar mensajes o recordatorios de una manera mucho más original.


Espero que te haya gustado, no dejes de visitarnos que se vienen unos post muy interesantes:D. Besoos.
Image and video hosting by TinyPic